I now have the simple specification that I have a text field in a Node which always needs to be uppercase, whatever the editor enters in the field. As a second specification I also want all spaces removed from the field values.
I could not find an example snippet to start up from, so I thought better publish this, maybe someone else will have an easier live than me....
Specification
Field x: user may enter any character, but on saving the field all characters will be uppercased.
Field x: Also, alle whitespaces will be removed from the string
1. Create a module, in this example called customchr.
1. a Create info file customchr.info
name = Custom CHR
description = Custum manipulations for the CHR site
package = Overboord
core = 7.x
2. Create module file customchr.module
function customchr_node_presave($node) {
if ($node->type == 'publication') {
// convert to uppercase
$tempstring=strtoupper($node->field_publication_code[und][0][value]);
// strip all whitespaces
$node->field_publication_code[und][0][value]= preg_replace('/\s+/', '', $tempstring);
}
}
Monday, November 25, 2013
Drupal 7 - Theming file field for documents
What seems to be a really simple task for any Drupalist got me really walking the ceiling this evening.
I just want to display my filefields, for the document, as a download limk with an icon denoting the file type and with the filesize mentioned. It seems to me that that should be the default way to show a download, but it is not.
After playing with the custom field formatters for a while, I used an easier approach.
1. Go to view modes and add a viewmode
2. give it a understandablen namen (vm_file_icon_download_size)
3. Check file
4. save
5. go to structure > file types (or older Drupal version you can find that under configuration)
6. click 'manage display' in the document row
7. click on tab 'custom display settings'
8. check the new view mode you just added
it appears as a tab in the top of your page
7. click on this tab and then click on manage file display
8. Choose table of files
Drupal will then show a rather ugly table with all element I want, the icon, the filename, the size.
I can rewrite the css to make it all a bit less ugly
.file.file-document table thead {
display:none;
}
.file.file-document table, .file.file-document table tr {
border:none;
background-color: #FFFFFF;
}
.file.file-document table td {
display:inline;
}
The link in the display will then look like
+-+2013-11-25_00.11.06.png)
I just want to display my filefields, for the document, as a download limk with an icon denoting the file type and with the filesize mentioned. It seems to me that that should be the default way to show a download, but it is not.
After playing with the custom field formatters for a while, I used an easier approach.
1. Go to view modes and add a viewmode
2. give it a understandablen namen (vm_file_icon_download_size)
3. Check file
4. save
5. go to structure > file types (or older Drupal version you can find that under configuration)
6. click 'manage display' in the document row
7. click on tab 'custom display settings'
8. check the new view mode you just added
it appears as a tab in the top of your page
7. click on this tab and then click on manage file display
8. Choose table of files
Drupal will then show a rather ugly table with all element I want, the icon, the filename, the size.
I can rewrite the css to make it all a bit less ugly
.file.file-document table thead {
display:none;
}
.file.file-document table, .file.file-document table tr {
border:none;
background-color: #FFFFFF;
}
.file.file-document table td {
display:inline;
}
The link in the display will then look like
BUG: Description bug
But when you enable a description this still won't show.
This is caused by a bug in the file entity module.
https://drupal.org/node/1784762
Using the patch resolves this issueBut when you enable a description this still won't show.
This is caused by a bug in the file entity module.
https://drupal.org/node/1784762
https://drupal.org/files/file-entity-load-description.patch
Wednesday, November 20, 2013
Drupal 7 - how to create a views block of all referenced nodes in the entity reference fields
I did this so many times but every time I seem to have to start all over again. Reason to write it all up and publish it here.
Others may have done this before and much better.
Setup
Drupal 7, Views, entity reference (multilingual)
In have contenttype A which contains an entity referemce field that can make a reference to contenttype B.
Specification
A. View of items referencing
I also want to display the list of all node C and D referring to the current project. Here I also want to show multiple fields from the referring node linking to the referring node itself.
I my case contenttype A is a project, and contenttype B are Institutes cooperating on these projects. Contenttypes C and D are articles and publications which are refer to the project in question.
B. View of referenced items
On displaying a contenttype A node I want to display some of the fields from the referenced node (contenttype B) in a sidebar.
How to A. View of items referencing
A.1 Create a new view
A.1.1 Call it f.i. 'related'
A.1.2 Choose fields for the format
A.2 Open the 'Advanced' tab on the right hand side
A.3 Click the Add button behind relationships
A.4 Select
A.6 On the next screen check Require this relationshop
You can also change the name of the identifier but I never see a reason for this.
In this example it is called:Content entity referenced from field_project_institutes
Now we need an argument to provide to the relationship, and the argument will be the nid of the current contenttype A node. To do this you have to provide a contextual filter
A.7 Click the Add button behind contextual filters
A.8 Check Content: Nid
A.9 Click Apply
A.10 A new screen: Choose the relationship you just made
In this example it is called:Content entity referenced from field_project_institutes
A.11 Select Provide a default value under When the filter value is not available
A.12 Under Type select Content id from url
A.13 Then, under When the filter value IS available or a default is provided check the Specify validation criteria box
A.14 Under Validator choose content and then check the contenttype b. The contenttype that is referred to, not the contenttype that contains the reference field.
A.15 Under Filter value format choose Node ID
A.16 Under Action to take if filter does not validate choose Hide view
A.17 Apply
A.18 Save your block view
How to B: View of referenced items
B.1 Create a new view
B.1.1 Call it f.i. 'related'
B.1.2 Choose fields for the format
B.2 Open the 'Advanced' tab on the right hand side
B.3 Click the Add button behind relationships
B.4 Select
B.5 Click Apply
B.6 On the next screen check Require this relationshop
You can also change the name of the identifier but I never see a reason for this.
B.6.1 and click Apply
In this example it is called:Content referencing Content from field_project_institutes
Now we need an argument to provide to the relationship, and the argument will be the nid of the current contenttype A node. To do this you have to provide a contextual filter
B.7 Click the Add button behind contextual filters
B.8 Check Content: Nid
B.9 Click Apply
B.10 A new screen: Choose the relationship you just made
In this example it is called:Content referencing Content from field_project_institutes
B.11 Select Provide a default value under When the filter value is not available
B.12 Under Type select Content id from url
B.13 Save your viws, and place ypur block in the correct region...
Extra
Suppose you want to show an image field from the node that is referred to in the sidebar, linking to this orihinal node. Seems an easy task doesn't it?
No. The problem is that you can easily ad the field to the view, select its viewmode, but wehn you want to link this field to the containing node, all html cleaners protest:
Adding the link aroudn the field does not work in this case, the a tag contains the div tag. Rewriting the output presents me with the samen problem.
The way i figured it out finally was to
a. Add the content path, as a field (use absoklute and hide from display)
b. Add the image, set its view mode but then strip all html tags except <img>
c. Create a global text field, and there rewrite the output to
something like <a href="[path]">[field_institute_logo]</a>
d. But you still have a problem than because the field_field_institute_logo value containes stripped text from html that is normally hidden to users. So then just create a field template for this global text field removing everything from there except the a and im tags and inner attributes.
$output = preg_replace('#.*?(<(img|a).+?>).*?#is', '$1', $output);
Node reference
On trying the same with nodereference I got really stuck but solved it eventually....
A.
1. add relationships
2. search for the noderefence field you want (NB NOT with ' - reverse')
(this is the node reference field in the node referring to the node type entity B)
(In my case, Inhoud: Verwijzing (field_verwijzing) )
3. Click apply (remember the name of the relationship*)
4. Select 'Require this relationship'
5. click apply
5. Add contextual filter
6. Chose Content: Nid
7. Click apply
8. Choose the relationship you just made (*)
9. Under When the filter value is not available choose 'provide default value'
9.1 Choose 'Content id from Url'
10. Under when the filter value is avaialable or a default is providedselect 'Specify validation citeria'
10. 1 (Depending on the install there should be an extra box , but in some installs the box wont show up, and you have to click apply and then click on the contextual filter again before you can add these criteria)
Under Validator choose Content
10.2 Under contenttypes choose your contenttype B
10.3 Under filter value format choose 'Node ID'
10.4 Under action to take when filter value does not validat Choose 'Hide view'
Others may have done this before and much better.
Setup
Drupal 7, Views, entity reference (multilingual)
In have contenttype A which contains an entity referemce field that can make a reference to contenttype B.
Specification
A. View of items referencing
I also want to display the list of all node C and D referring to the current project. Here I also want to show multiple fields from the referring node linking to the referring node itself.
I my case contenttype A is a project, and contenttype B are Institutes cooperating on these projects. Contenttypes C and D are articles and publications which are refer to the project in question.
B. View of referenced items
On displaying a contenttype A node I want to display some of the fields from the referenced node (contenttype B) in a sidebar.
How to A. View of items referencing
A.1 Create a new view
A.1.1 Call it f.i. 'related'
A.1.2 Choose fields for the format
A.2 Open the 'Advanced' tab on the right hand side
A.3 Click the Add button behind relationships
A.4 Select
(you have ond eof these for every entity reference field in your contenttype)
In my case I have A bridge to the Content entity that is referenced via field_project_institutes
A.5 Click ApplyIn my case I have A bridge to the Content entity that is referenced via field_project_institutes
A.6 On the next screen check Require this relationshop
You can also change the name of the identifier but I never see a reason for this.
In this example it is called:Content entity referenced from field_project_institutes
Now we need an argument to provide to the relationship, and the argument will be the nid of the current contenttype A node. To do this you have to provide a contextual filter
A.7 Click the Add button behind contextual filters
A.8 Check Content: Nid
A.9 Click Apply
A.10 A new screen: Choose the relationship you just made
In this example it is called:Content entity referenced from field_project_institutes
A.11 Select Provide a default value under When the filter value is not available
A.12 Under Type select Content id from url
A.13 Then, under When the filter value IS available or a default is provided check the Specify validation criteria box
A.14 Under Validator choose content and then check the contenttype b. The contenttype that is referred to, not the contenttype that contains the reference field.
A.15 Under Filter value format choose Node ID
A.16 Under Action to take if filter does not validate choose Hide view
A.17 Apply
A.18 Save your block view
How to B: View of referenced items
B.1 Create a new view
B.1.1 Call it f.i. 'related'
B.1.2 Choose fields for the format
B.2 Open the 'Advanced' tab on the right hand side
B.3 Click the Add button behind relationships
B.4 Select
B.5 Click Apply
B.6 On the next screen check Require this relationshop
You can also change the name of the identifier but I never see a reason for this.
B.6.1 and click Apply
In this example it is called:Content referencing Content from field_project_institutes
Now we need an argument to provide to the relationship, and the argument will be the nid of the current contenttype A node. To do this you have to provide a contextual filter
B.7 Click the Add button behind contextual filters
B.8 Check Content: Nid
B.9 Click Apply
B.10 A new screen: Choose the relationship you just made
In this example it is called:Content referencing Content from field_project_institutes
B.11 Select Provide a default value under When the filter value is not available
B.12 Under Type select Content id from url
B.13 Save your viws, and place ypur block in the correct region...
Extra
Suppose you want to show an image field from the node that is referred to in the sidebar, linking to this orihinal node. Seems an easy task doesn't it?
No. The problem is that you can easily ad the field to the view, select its viewmode, but wehn you want to link this field to the containing node, all html cleaners protest:
Adding the link aroudn the field does not work in this case, the a tag contains the div tag. Rewriting the output presents me with the samen problem.
The way i figured it out finally was to
a. Add the content path, as a field (use absoklute and hide from display)
b. Add the image, set its view mode but then strip all html tags except <img>
c. Create a global text field, and there rewrite the output to
something like <a href="[path]">[field_institute_logo]</a>
d. But you still have a problem than because the field_field_institute_logo value containes stripped text from html that is normally hidden to users. So then just create a field template for this global text field removing everything from there except the a and im tags and inner attributes.
$output = preg_replace('#.*?(<(img|a).+?>).*?#is', '$1', $output);
Node reference
On trying the same with nodereference I got really stuck but solved it eventually....
A.
1. add relationships
2. search for the noderefence field you want (NB NOT with ' - reverse')
(this is the node reference field in the node referring to the node type entity B)
(In my case, Inhoud: Verwijzing (field_verwijzing) )
3. Click apply (remember the name of the relationship*)
4. Select 'Require this relationship'
5. click apply
5. Add contextual filter
6. Chose Content: Nid
7. Click apply
8. Choose the relationship you just made (*)
9. Under When the filter value is not available choose 'provide default value'
9.1 Choose 'Content id from Url'
10. Under when the filter value is avaialable or a default is providedselect 'Specify validation citeria'
10. 1 (Depending on the install there should be an extra box , but in some installs the box wont show up, and you have to click apply and then click on the contextual filter again before you can add these criteria)
Under Validator choose Content
10.2 Under contenttypes choose your contenttype B
10.3 Under filter value format choose 'Node ID'
10.4 Under action to take when filter value does not validat Choose 'Hide view'
Friday, November 1, 2013
Dupal 7 - Media and View modes - How to get an image style as a view mode in the list in the media browser
I've been battling with this for quite some time, so maybe someone else be happy with this post.
You define an Image style and want to be able to select this style in the display setting for your content type, or in the display settings for a field in a view.
Here is a simple flowchart to achieve this.
1.define a new image style
1.1 go to administration > Configuration > Media
admin/config/media/image-styles
1.2 add image style
1.3 give it a descriptional name
f.i. call it verylargeimage
1.3 add effects
f.i. set scale and crop
Width 624
height 400
1.4 update style
2. create a corresponding view
mode
Do this with display suite or with entity view mode
example here is done with Display suite
2.1 got to administration > Structure > Display Suite > View Modes [tab]
admin/structure/ds/view_modes
2.2 click add a view mode
2.3 Give it a name you can easily relate to the image style
In this example f.i. vm_verylargeimage
2.4 Select the file checkbox
2.5 Click Save
3. Connect the style and the view mode
3. 1 Navigate to Administer -> Configuration ->Media -> File Types
If you are using Media 2.x, then the File types has moved to Administer -> Structure -> File Types.
admin/structure/file-types
3.2 Click on manage display on the image row
3.3 open tab (under left) custom display settings
3.4 check the checkbox in front of youre viewmode name
In this example vm_verylargeimage
3.5 In the upper right corner you see your viewmode added to the viewmodes menu
3.6 Click on manage file display
3.7 Click on your viewmode
In
this example vm_verylargeimage
3.8 Select under Enabled displays 'Image'
3.9 Select your image style on the bottom of the page
3.8 Select under Enabled displays 'Image'
3.9 Select your image style on the bottom of the page
In the display settings for the field in your contenttype, or your view, you can now choose the corresponding view mode.
- Drupal 7
- Media
- view modes
Sunday, October 20, 2013
Setup a Drupal 7 Multilingual site
This post is about how to setup a multilingual website with content translation.
I will do another post about entitity translation, but setting up a site with entity translation is, in my opinion, not ready for production releases. [*]
1. Install a Drupal 7 site
2. download needed interface translations
for drupal core from here: http://ftp.drupal.org/files/translations/7.x/drupal/
3. save them
(the languages you plan to install) in /profiles/standard/translations/
4. Enable locale and content translation (are in drupal core)
5. Download and install
internationalization (i18n)
https://drupal.org/project/i18n
variable
https://drupal.org/project/variable
You need this module when for instance you have a node page as your front page, and automatically wnat yo switch this to the german version when changing language.
localization update
https://drupal.org/project/l10n_update
Provides automatic downloads and updates for translations.
6. Under internationalization choose
which modules tom enable
menu translation
You have to make a choice: If both (or all of) your siets wille have the exact same sytructure, with all content translated, you will be verwy happy with the menu translation module. Its a RAD feature for the menu's. But when you have sites which have a different structure for all language versions, this module will make you very, very, verry unhappy. Then you'll be better of with simply maken menu blocks and showing them dependent on the language.
In this showcase We'll be using this, cause the language versions of the site will be exactly congruent.
path translation
Normal nodes and users will be codennecte in translation sets. But to be able to add a language switch to for instance a page view, or a panel page, you will need path translations.
translation sets
This will couple the different language versions (which are nodes) in a language set.
String translation
Enables translations for string in modules, templates etcetera (added with the t-function) that are not added to the po files. Not strickly neccesary but come in handy.
Multilingual content
Also not strickly neccesary but helps the workflow. You can set default languages, lock node translations on existing nodes, etcetera.
Field translation
This option is also not a content deirected translation module, bu helps the workflow. You can translate texts associated with field settings etcetera. So helpfull when you have a multilingual site and want users or administrators to see help texts et cetera in their own language.
There is another module 'entity translations' which deals with the language versions of fields within a node, but thats quite another story...
Block languages
You definitely want that. It enables you to handle blocks just as you handle nodes. You can translate a block, and set for which langua version it has to appear.
Multilingual select
When you want to be able to select languages in a view, you need this module. Variable translation
You need this module for instance when yoy want to set a different homepage, and the homepage being a specific node, on for each language version.
5. Go to configuration /admin/config
6. Go to languages /admin/config/regional/language
7. add the languages you need
(im my case I installed germand and french next to english, and disable french because the site will for now be english/german, and in a later stage be extended with the french version.
8. Add language prefixes to the path
That's on the language pag, /admin/config/regional/language, and click on edit behind each alnguage
The custom way is to add the language code as a path prefix.
In my case 'en' for english, 'de' for german (as in 'deutch') and 'fr' for french.
(on existing siytes this option wil defenitely break all existing nodes paths! So google around how to avoid that.) [*]
9. Language detection
While you are still on the language page, click the tab 'Dtection and selection'
/admin/config/regional/language/configure
Simply choose Determine the language from the URL (Path prefix or domain).
(there is a lot to say about the other options, but we simply skip that for another day)[*]
10. Import core (and module) interface languages
If you've saved the language po files on de server in the map profiles/standard/translations during install of teh language this languager file will be imported.
Otherwise you have to download the po file later, go to configuration, admin/config, and under regional and language, select translate interface: Translate the interface. Then choose the import tab, and the rest is just following orders...
10.1 Automation
Because you've installed the internationalization update module, you also have a tab 'update' on this page, where you can check which module ranslations have not been added yet...
admin/config/regional/translate/update
Now you can dowmnload and import alle these files by hand, but a better way is to simply push the update button underneath your page. get a cup of coffe, eat some bisquits, talk to the wife (or the man), play with your children. Drupal automatically imports all translation files needed.
 11. Enable multilingual contentypes
Go to each translatable contenttype and under publishing options enable the 'multilingual settings with translation'.
Dont't forget the translation part. You won't be the first frantically looking for this translate tab
Go to the multilingual settings under the same contenttype and choose the settings you want. I usually do this
12. Multilingual paths
If you've not yet installed pathauto, do so immediately!
https://drupal.org/project/pathauto
Because you want to make your paths also multilingual, so if you have a standard in your autopath for for instance a contenttype 'loveletters', say 'love-letters/[node:title]' you can set a pattern for the french version like 'lettres-d-amour/[node:title]'
You'll probably also need transliteration
https://drupal.org/project/transliteration
To convert any diacritic characters like the æ danish.
After installingTransliteration, go to Configuration > Search and metadata > Url aliases > Settings
There check the option ' Transliterate prior to creating alias' and 'Reduce strings to letters and numbers'.
A page with 'Jæle' in the name will then be saved with an url 'jaele'.
13. Roles
Create an editor role, an set permissions for this role for the site maintainers.
14. Homepage
In my case I wil need two (and lateronon three) nodes for each language version to be the homepage.
The homepage wil consist of some views and block.
Fisrst I add a node for the english frontpage, and tranlate this one for the german frontpage.
We need now to have Variable and Variable translation installed.
14.1
Go to configuration, regional and language, multilingual settings, the variables tab.
Choose the site information sub tab and select the deafult front page.
Better is to select all options given there.
14.2
Now go to the configuration > site information page. And add the url to the default front page.
It's best to add it with the node path like node/2'. (no slash in front)
Select one of the the other languages on the top of the configuration page (which is simply a menu for the language contect of the translateble variables in the current configuration page) to change the setting for these languages.
NB! The configuration page has a language prefix before it, which may be confusing.
14.3
If you go to the home page and change languages with the language switch, you'll see everything works hunky dory.
15. Multilingual menu's
One way to ad multil;ingual menu's is to simply add menu blocks, and make them visible on the basis of the language of the current page.
But as I am building a website with equivalent structures, I want every menu and item to be translatable.
15. 1
Go to configuration, regional and language, multilingual settings, the variables tab. Then select the Menu settings tab.
15.2 Select the 'Source for the Main links' to be translatable.
15.3 Create an new menu item (say Top menu)
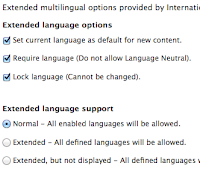
15.4 Set ' Translate and Localize. Menu items with language will allow translations. Menu items without language will be localized. ' under Multilingual options.
15.5 Click the translate tab and change menu name for every language.
15.5 Go to structure, content types and add thin menu to all contentypes that you will possibly link to from this menu.
16. Translatable blocks
It is of course quite handy to be able to create translations of block. Thats working now if you've followed the instructions above.
One thing though is that you are defauylt only allowed to translate plain text. So if youve made a block with filtered html content, and try to translate that, you get an error message.
You have to go to admin/config/regional/i18n/strings and allow translation for filtered html and full html also.
17. User profiles
The problem is that, unless you install entity translation, which has some major flaws in D7 (honestly, the ast time I did a major check on that was about a year ago) de option of adding fields to the account, does not allow for translation of the content.
I tried out Profile2, but that module strangely enough does not support translations. Not even the entity translation of the fields. (Or at least not that I could find a way to accomplish this.....)
SolutionThe solution I came up was to use entity translation just for the users, and use the other translation modules for the rest of the site.
17.1 Install Entity translation
17.2 Navigate to Configuration > Regional and Language > Entity translation
17.3 Open tab 'Translatable entity types'
17.4 enable user and disable node
(In this case I do not want to use this possibility and it only clutteres my maintenance interface)
17.5 Enable the module Field translations
17.6 Go to Configuration > People > Account settings and open tab manage fields
17.7 Add any fields you like and in each field check the option under 'Field translation': users may translate this field
(The module field translations is something totally different and just supports the translation of the labels, not of the field content itself, which come in handy but is not allied to the translatiom of the field contents)
17.8 On adding fields choose wisely if you also want them on the registration form, and if you want them translatebale....
18. Images
Wel, there's a subject that sometime makes my head spin. An imafe is a file, and for most files in a multisite setup the german file needs to be different form the english file, and the freanch file and the indian file. So, any filefield you setup as an normal field.
On translating the node you reove the otherlanguage file and replace it with an upload in the language you are translating to.
But: Images are different.
18.1 Specifications
Usually you probably ussually want to use the same image on both language versions, but, and there the is problem, you want to be able to translate the alt, title and caption of the image.
On the other hand, somatime the image contains a lot of language (charts, graphs, et cetera) in which case you want to be able to remove the image just like the normal file case, and replace it with another.
So we want the same setup for an image as for a file, so that on translation you can chroose wether you remove the image or not. But, while keeping the same image, you do want to translate the alt and title texts.
(In this example I could not get the media widget in ckeditor to work, so in the end I skipped media as a ckeditor widget and chose for a hybrid solution, using the media widget for the filefields and IMCE for the image uploads in teh RTEditor.)
18.2 MEDIA settings
18.2.1 Go to admin > configuration > regional and anguage > entity translation
18.2.2 Add 'file' to the translatable entity types.
This merely adds the possibility of entity translation to the file type
18.2.3 Go to structure > file types > image > manage fields
18.2.4 Click on edit in tge alt and title row and enable translation under 'Users may translate this field.'
Then, for every image there is a link 'add {language} translation' en de media popup widget
Thats is to say: there should be.
For my install (Media 7.x-2.0-alpha3 and file entity 7.x-2.0-alpha3) the link only appears when your admin interface is in the language of the other (nonn sourec) language.
So, I habe an Eglish site with a second language german. To be able to translate the alt and title values, I need to translate the node, save it, switch to the german interface, edit the node, open the media widget for the image and only then the add translation link is visible....
18.3 IMCE settings
Is specified a few specific folders for the file uploads on certain contenttypes.
I created two subdirectories in the files folder where the file fields mentioned above save their images. Fo IMCE I added a profile that only has access to those folders>
Now placing an image in the wysiwyg editor is ok. Translation of alt and title works the same as the translation of the text.
19. Entity references
Well, there are really some annoying problems with entity reference and a multilanguage site.
19.1 Entity reference autocomplete uses interface language instead of the node's.
What this means is that when you edit a french node in the english admin interface, it will only show english nodes
There is an option to filter the autocomplete function using an "entity reference" view. But there is also only the option of using the 'current usres' language, and that is teh interface language.
So the only way to solve this is to always switch to the interface language of the node you are editing, and then the autocomplete will show the correct nodes in the same language as the nod eyou are editing.
But this is annoying and error prone
19.2 translation workflow
Another thing is you would like a translation workflow where the entity reference field in Node x in language A to referenced node y in language A, should automatically translate to an reference entity field in node xt (translation of x in language B) to referenced node yt (translation of y in language B).
This is not the case. The referenced entity in node xt in language B is pointing to node y in language
20. Multilingual page views
The path to a page view is alwas the same, and for some solutions it will be better to have a single page view, as opposed to having to add two the same views for a single view. And then again, the opposite language fview will be accessible from the other language to.
Solution is then to install i18n page views
This module a new page view type: The only difference is that you can define different paths for your language versions.
Furthermore the paths connect the page view just like a translation set, so the language swich works just as designed.
21. The trouble with field collections
There is a flaw in the field collection module when it comes to content translation.
Suppose you create a new contenttype and add a (repeatable) fieldcollections to it. Create a node and fill alle fields, also some field collections. Then create a translation for this node.
Bug: The fieldcollections in that translations will then have the same entity id as the ones in the node in the original source language. So you end up with two nodes sharing the same field collections field. What then happens on editing the fieldcollection fields in language x, the corresponding fields in language y then also get edited.
They are the same.
(Enabling entity tranlation on these field collection fields creates other problems which I will not elaborate on at this point.)
This problem does not arise twhen you add new field to both nodes in the translation set, after they have been created. Then these fields are two different entities and unique for either node.
solution
There is a long discussion going on about the patch for the field translation module, but in the meantime there is a solution which works great for my sites. I did not think this one up myself but it is conceived by a guy called Martin. Hook into the translation workflow, and remove the id for the fieldcollection entities when the original node is cloned.
Just build a module, add this code
X. Search
If you've setup the site as mentioned above, search will default be set so that when you search content, you'll only get the content in the language version you are in now. So that is good. Praise Drupal!
I will do another post about entitity translation, but setting up a site with entity translation is, in my opinion, not ready for production releases. [*]
1. Install a Drupal 7 site
2. download needed interface translations
for drupal core from here: http://ftp.drupal.org/files/translations/7.x/drupal/
3. save them
(the languages you plan to install) in /profiles/standard/translations/
4. Enable locale and content translation (are in drupal core)
5. Download and install
internationalization (i18n)
https://drupal.org/project/i18n
variable
https://drupal.org/project/variable
You need this module when for instance you have a node page as your front page, and automatically wnat yo switch this to the german version when changing language.
localization update
https://drupal.org/project/l10n_update
Provides automatic downloads and updates for translations.
6. Under internationalization choose
which modules tom enable
menu translation
You have to make a choice: If both (or all of) your siets wille have the exact same sytructure, with all content translated, you will be verwy happy with the menu translation module. Its a RAD feature for the menu's. But when you have sites which have a different structure for all language versions, this module will make you very, very, verry unhappy. Then you'll be better of with simply maken menu blocks and showing them dependent on the language.
In this showcase We'll be using this, cause the language versions of the site will be exactly congruent.
path translation
Normal nodes and users will be codennecte in translation sets. But to be able to add a language switch to for instance a page view, or a panel page, you will need path translations.
translation sets
This will couple the different language versions (which are nodes) in a language set.
String translation
Enables translations for string in modules, templates etcetera (added with the t-function) that are not added to the po files. Not strickly neccesary but come in handy.
Multilingual content
Also not strickly neccesary but helps the workflow. You can set default languages, lock node translations on existing nodes, etcetera.
Field translation
This option is also not a content deirected translation module, bu helps the workflow. You can translate texts associated with field settings etcetera. So helpfull when you have a multilingual site and want users or administrators to see help texts et cetera in their own language.
There is another module 'entity translations' which deals with the language versions of fields within a node, but thats quite another story...
Block languages
You definitely want that. It enables you to handle blocks just as you handle nodes. You can translate a block, and set for which langua version it has to appear.
Multilingual select
When you want to be able to select languages in a view, you need this module. Variable translation
You need this module for instance when yoy want to set a different homepage, and the homepage being a specific node, on for each language version.
5. Go to configuration /admin/config
6. Go to languages /admin/config/regional/language
7. add the languages you need
(im my case I installed germand and french next to english, and disable french because the site will for now be english/german, and in a later stage be extended with the french version.
8. Add language prefixes to the path
That's on the language pag, /admin/config/regional/language, and click on edit behind each alnguage
The custom way is to add the language code as a path prefix.
In my case 'en' for english, 'de' for german (as in 'deutch') and 'fr' for french.
(on existing siytes this option wil defenitely break all existing nodes paths! So google around how to avoid that.) [*]
9. Language detection
While you are still on the language page, click the tab 'Dtection and selection'
/admin/config/regional/language/configure
Simply choose Determine the language from the URL (Path prefix or domain).
(there is a lot to say about the other options, but we simply skip that for another day)[*]
10. Import core (and module) interface languages
If you've saved the language po files on de server in the map profiles/standard/translations during install of teh language this languager file will be imported.
Otherwise you have to download the po file later, go to configuration, admin/config, and under regional and language, select translate interface: Translate the interface. Then choose the import tab, and the rest is just following orders...
10.1 Automation
Because you've installed the internationalization update module, you also have a tab 'update' on this page, where you can check which module ranslations have not been added yet...
admin/config/regional/translate/update
Now you can dowmnload and import alle these files by hand, but a better way is to simply push the update button underneath your page. get a cup of coffe, eat some bisquits, talk to the wife (or the man), play with your children. Drupal automatically imports all translation files needed.
 11. Enable multilingual contentypes
Go to each translatable contenttype and under publishing options enable the 'multilingual settings with translation'.
Dont't forget the translation part. You won't be the first frantically looking for this translate tab
Go to the multilingual settings under the same contenttype and choose the settings you want. I usually do this
12. Multilingual paths
If you've not yet installed pathauto, do so immediately!
https://drupal.org/project/pathauto
Because you want to make your paths also multilingual, so if you have a standard in your autopath for for instance a contenttype 'loveletters', say 'love-letters/[node:title]' you can set a pattern for the french version like 'lettres-d-amour/[node:title]'
You'll probably also need transliteration
https://drupal.org/project/transliteration
To convert any diacritic characters like the æ danish.
After installingTransliteration, go to Configuration > Search and metadata > Url aliases > Settings
There check the option ' Transliterate prior to creating alias' and 'Reduce strings to letters and numbers'.
A page with 'Jæle' in the name will then be saved with an url 'jaele'.
13. Roles
Create an editor role, an set permissions for this role for the site maintainers.
14. Homepage
In my case I wil need two (and lateronon three) nodes for each language version to be the homepage.
The homepage wil consist of some views and block.
Fisrst I add a node for the english frontpage, and tranlate this one for the german frontpage.
We need now to have Variable and Variable translation installed.
14.1
Go to configuration, regional and language, multilingual settings, the variables tab.
Choose the site information sub tab and select the deafult front page.
Better is to select all options given there.
14.2
Now go to the configuration > site information page. And add the url to the default front page.
It's best to add it with the node path like node/2'. (no slash in front)
Select one of the the other languages on the top of the configuration page (which is simply a menu for the language contect of the translateble variables in the current configuration page) to change the setting for these languages.
NB! The configuration page has a language prefix before it, which may be confusing.
14.3
If you go to the home page and change languages with the language switch, you'll see everything works hunky dory.
15. Multilingual menu's
One way to ad multil;ingual menu's is to simply add menu blocks, and make them visible on the basis of the language of the current page.
But as I am building a website with equivalent structures, I want every menu and item to be translatable.
15. 1
Go to configuration, regional and language, multilingual settings, the variables tab. Then select the Menu settings tab.
15.2 Select the 'Source for the Main links' to be translatable.
15.3 Create an new menu item (say Top menu)
15.4 Set ' Translate and Localize. Menu items with language will allow translations. Menu items without language will be localized. ' under Multilingual options.
15.5 Click the translate tab and change menu name for every language.
15.5 Go to structure, content types and add thin menu to all contentypes that you will possibly link to from this menu.
16. Translatable blocks
It is of course quite handy to be able to create translations of block. Thats working now if you've followed the instructions above.
One thing though is that you are defauylt only allowed to translate plain text. So if youve made a block with filtered html content, and try to translate that, you get an error message.
You have to go to admin/config/regional/i18n/strings and allow translation for filtered html and full html also.
17. User profiles
The problem is that, unless you install entity translation, which has some major flaws in D7 (honestly, the ast time I did a major check on that was about a year ago) de option of adding fields to the account, does not allow for translation of the content.
I tried out Profile2, but that module strangely enough does not support translations. Not even the entity translation of the fields. (Or at least not that I could find a way to accomplish this.....)
SolutionThe solution I came up was to use entity translation just for the users, and use the other translation modules for the rest of the site.
17.1 Install Entity translation
17.2 Navigate to Configuration > Regional and Language > Entity translation
17.3 Open tab 'Translatable entity types'
17.4 enable user and disable node
(In this case I do not want to use this possibility and it only clutteres my maintenance interface)
17.5 Enable the module Field translations
17.6 Go to Configuration > People > Account settings and open tab manage fields
17.7 Add any fields you like and in each field check the option under 'Field translation': users may translate this field
(The module field translations is something totally different and just supports the translation of the labels, not of the field content itself, which come in handy but is not allied to the translatiom of the field contents)
17.8 On adding fields choose wisely if you also want them on the registration form, and if you want them translatebale....
18. Images
Wel, there's a subject that sometime makes my head spin. An imafe is a file, and for most files in a multisite setup the german file needs to be different form the english file, and the freanch file and the indian file. So, any filefield you setup as an normal field.
On translating the node you reove the otherlanguage file and replace it with an upload in the language you are translating to.
But: Images are different.
18.1 Specifications
Usually you probably ussually want to use the same image on both language versions, but, and there the is problem, you want to be able to translate the alt, title and caption of the image.
On the other hand, somatime the image contains a lot of language (charts, graphs, et cetera) in which case you want to be able to remove the image just like the normal file case, and replace it with another.
So we want the same setup for an image as for a file, so that on translation you can chroose wether you remove the image or not. But, while keeping the same image, you do want to translate the alt and title texts.
(In this example I could not get the media widget in ckeditor to work, so in the end I skipped media as a ckeditor widget and chose for a hybrid solution, using the media widget for the filefields and IMCE for the image uploads in teh RTEditor.)
18.2 MEDIA settings
18.2.1 Go to admin > configuration > regional and anguage > entity translation
18.2.2 Add 'file' to the translatable entity types.
This merely adds the possibility of entity translation to the file type
18.2.3 Go to structure > file types > image > manage fields
18.2.4 Click on edit in tge alt and title row and enable translation under 'Users may translate this field.'
Then, for every image there is a link 'add {language} translation' en de media popup widget
Thats is to say: there should be.
For my install (Media 7.x-2.0-alpha3 and file entity 7.x-2.0-alpha3) the link only appears when your admin interface is in the language of the other (nonn sourec) language.
So, I habe an Eglish site with a second language german. To be able to translate the alt and title values, I need to translate the node, save it, switch to the german interface, edit the node, open the media widget for the image and only then the add translation link is visible....
18.3 IMCE settings
Is specified a few specific folders for the file uploads on certain contenttypes.
I created two subdirectories in the files folder where the file fields mentioned above save their images. Fo IMCE I added a profile that only has access to those folders>
Now placing an image in the wysiwyg editor is ok. Translation of alt and title works the same as the translation of the text.
19. Entity references
Well, there are really some annoying problems with entity reference and a multilanguage site.
19.1 Entity reference autocomplete uses interface language instead of the node's.
What this means is that when you edit a french node in the english admin interface, it will only show english nodes
There is an option to filter the autocomplete function using an "entity reference" view. But there is also only the option of using the 'current usres' language, and that is teh interface language.
So the only way to solve this is to always switch to the interface language of the node you are editing, and then the autocomplete will show the correct nodes in the same language as the nod eyou are editing.
But this is annoying and error prone
19.2 translation workflow
Another thing is you would like a translation workflow where the entity reference field in Node x in language A to referenced node y in language A, should automatically translate to an reference entity field in node xt (translation of x in language B) to referenced node yt (translation of y in language B).
This is not the case. The referenced entity in node xt in language B is pointing to node y in language
(Adding the Translation redirect more or less solves this problem for unauthenticated user, biy redirecting them to the translated versions of the 'wrong' links, but thats not really a solution.)
The combination of 19.1 and 19.2 make translation of an entity reference field very cumbersome and error prone!
I tried using the entity reference field translatable with entity translation and not translatable with entity translation. The issue remains!houtje-touwtje solution
A solution is to switch your admin interface when translating or editing a node.
It would solve the problem, which I think is Drupal core, but it is a rather quirky solution cause a maintainer would probably have his/hers admininterface language stable.
There used to be such a setting "Switch interface language to fit node language when creating or editing a translation" but that is gone now. For some bad reasons I think.
https://drupal.org/node/1438288
https://drupal.org/node/1551688
Links for this issue
sandbox project dedicated to solving this issue (no solution)
https://drupal.org/sandbox/svendecabooter/1736970
referencing the same problem
https://drupal.org/node/2033053
https://drupal.org/node/2033053
referencing the same problem
No solution either
http://drupal.stackexchange.com/questions/74355/translated-node-does-not-use-translated-entity-reference-how-to-fix-this20. Multilingual page views
The path to a page view is alwas the same, and for some solutions it will be better to have a single page view, as opposed to having to add two the same views for a single view. And then again, the opposite language fview will be accessible from the other language to.
Solution is then to install i18n page views
This module a new page view type: The only difference is that you can define different paths for your language versions.
Furthermore the paths connect the page view just like a translation set, so the language swich works just as designed.
21. The trouble with field collections
There is a flaw in the field collection module when it comes to content translation.
Suppose you create a new contenttype and add a (repeatable) fieldcollections to it. Create a node and fill alle fields, also some field collections. Then create a translation for this node.
Bug: The fieldcollections in that translations will then have the same entity id as the ones in the node in the original source language. So you end up with two nodes sharing the same field collections field. What then happens on editing the fieldcollection fields in language x, the corresponding fields in language y then also get edited.
They are the same.
(Enabling entity tranlation on these field collection fields creates other problems which I will not elaborate on at this point.)
This problem does not arise twhen you add new field to both nodes in the translation set, after they have been created. Then these fields are two different entities and unique for either node.
solution
There is a long discussion going on about the patch for the field translation module, but in the meantime there is a solution which works great for my sites. I did not think this one up myself but it is conceived by a guy called Martin. Hook into the translation workflow, and remove the id for the fieldcollection entities when the original node is cloned.
Just build a module, add this code
function MyModule_field_attach_presave($entity_type, $entity) {
// Clear the item_id on the field collection entity before saving in order to force
// creation of a new field collection rather than overwriting the original
// creation of a new field collection rather than overwriting the original
if (empty($entity->is_new)) {
if ($entity_type == 'field_collection_item') {
if (isset($entity->item_id)) {
$entity->item_id ='';
$entity->save(TRUE);
}
}
}
}
X. Search
If you've setup the site as mentioned above, search will default be set so that when you search content, you'll only get the content in the language version you are in now. So that is good. Praise Drupal!
Friday, September 27, 2013
Warning - Dutch fairy tale
Het
verhaal van de Kapper van Hamelen
Er was eens een stadje (lang geleden maar niet zo ver weg) waar een verschrikkelijke rattenplaag heerste. Wat de mensen ook deden, niets hielp om de ratten te verjagen. Op het laatst zaten ze 's ochtends brutaal op de nachtkastjes te piepen, ze sliepen bij de mensen in de bedden, en ze vraten alles op.
Op een goede dag kwam er een kapper op bezoek in het stadje. "Wat is er aan de hand?" vroeg hij toen hij de mensen treurig en ongekamd over de straten zag sjokken. "O, het is vreselijk!" zeiden de mensen. "De hele stad zit vol met die stinkende, smerige ratten. En niets helpt!" De kapper fronste zijn wenkbrauwen. "Niets helpt?" "Nee, we hebben alles al geprobeerd!" Daarop meldde de kapper zich bij het stadbestuur en zei daar dat hij, tegen een niet onaanzienlijke vergoeding, dit varkentje wel kon wassen. De burgemeester beloofde hem daarop een kruiwagen vol goud, en de kapper zei dat iedereen die nacht binnen moest blijven met de slaapmuts stijf over het hoofd getrokken.
En zo geschiedde het. De hele nacht was de kapper druk in de weer, en toen de mensen de volgende morgen wakker werden, en verwachtten (hoewel met enige twijfel, ik bedoel maar, wat kan zo'n kapper nou?) dat alle ratten verdwenen zouden zijn, was dit tot hun verbazing toch niet het geval. De ratten waren er nog steeds, overal, op de tafeltjes, de kastjes, in de gordijnen en op de grond. Alleen waren ze nu allen keurig geknipt, hun vacht zag er glanzend en geborsteld uit en ze roken heerlijk naar rozen of viooltjes.
De burgers waren woedend, en de burgermeester weigerde de kapper zijn goud te betalen. "Maar ik heb het probleem opgelost!" Schreeuwde de woedende kapper, die er niets van begreep. En als dank voor zijn harde werk die nacht, werd de kapper het stadje uitgeschopt. Slechts een paar mensen zagen de woede in zijn ogen, en hoorden hem mompelen. "Wacht maar, dit zet ik jullie betaald!" "Is het misschien toch niet eerlijk om hem op zijn minst een deel van het goud te betalen?" vroeg een van hen. Maar de burgermeester schudde zijn hoofd. "Van zo'n kapper hebben wij niets te duchten. Het is een charlatan."
Die avond gingen de mensen sjacherijnig en moe weer naar bed, omringd door duizenden geurende, zijdezachte ratten. (Sommigen moesten hun kinderen zelfs verbieden de knaagdieren te knuffelen en te aaien.) Maar toen ze de volgende morgen wakker werden ontdekten ze wat de kapper had bedoeld met 'dit zet ik jullie betaald'. Al hun kinderen, hun onschuldige kinderen, waren die nacht, zonder uitzondering, prachtig geknipt. De een nog mooier dan de ander.

I met a fish today

I met a fish today.
A fish with no legs, no hair and no voice to speak of.
And this fish wanted to be a bird.
(I know these things; fishes wanting to be birds, cows longing for blood, horses dreaming of hatching)
So I knitted it some wings and taugth it how to fly.
And the fish asked howcome
- the trees
- the why of them branching
- the uses of vertigo
- the absence of teeth
And I told it all these things.
Except for the teeth, cause you never know...
Subscribe to:
Posts (Atom)